> ## Documentation Index
> Fetch the complete documentation index at: https://docs.bland.ai/llms.txt
> Use this file to discover all available pages before exploring further.
# Build your first agent
> Go from no agent to a live phone call in your first Bland session
This guide covers the new Bland dashboard at `v2.app.bland.ai`, our new way of building agents that rolled out September 10, 2026. It walks you from a fresh account to a live phone call with your first agent in three steps, then covers two optional additions you can make afterwards. No code required. When you finish the first three, you'll dial a number you just set up and your agent will answer on your own phone.
## Prerequisites
* A [Bland account](https://v2.app.bland.ai/signup)
* A phone you can dial out from
## Step 1: Create an agent
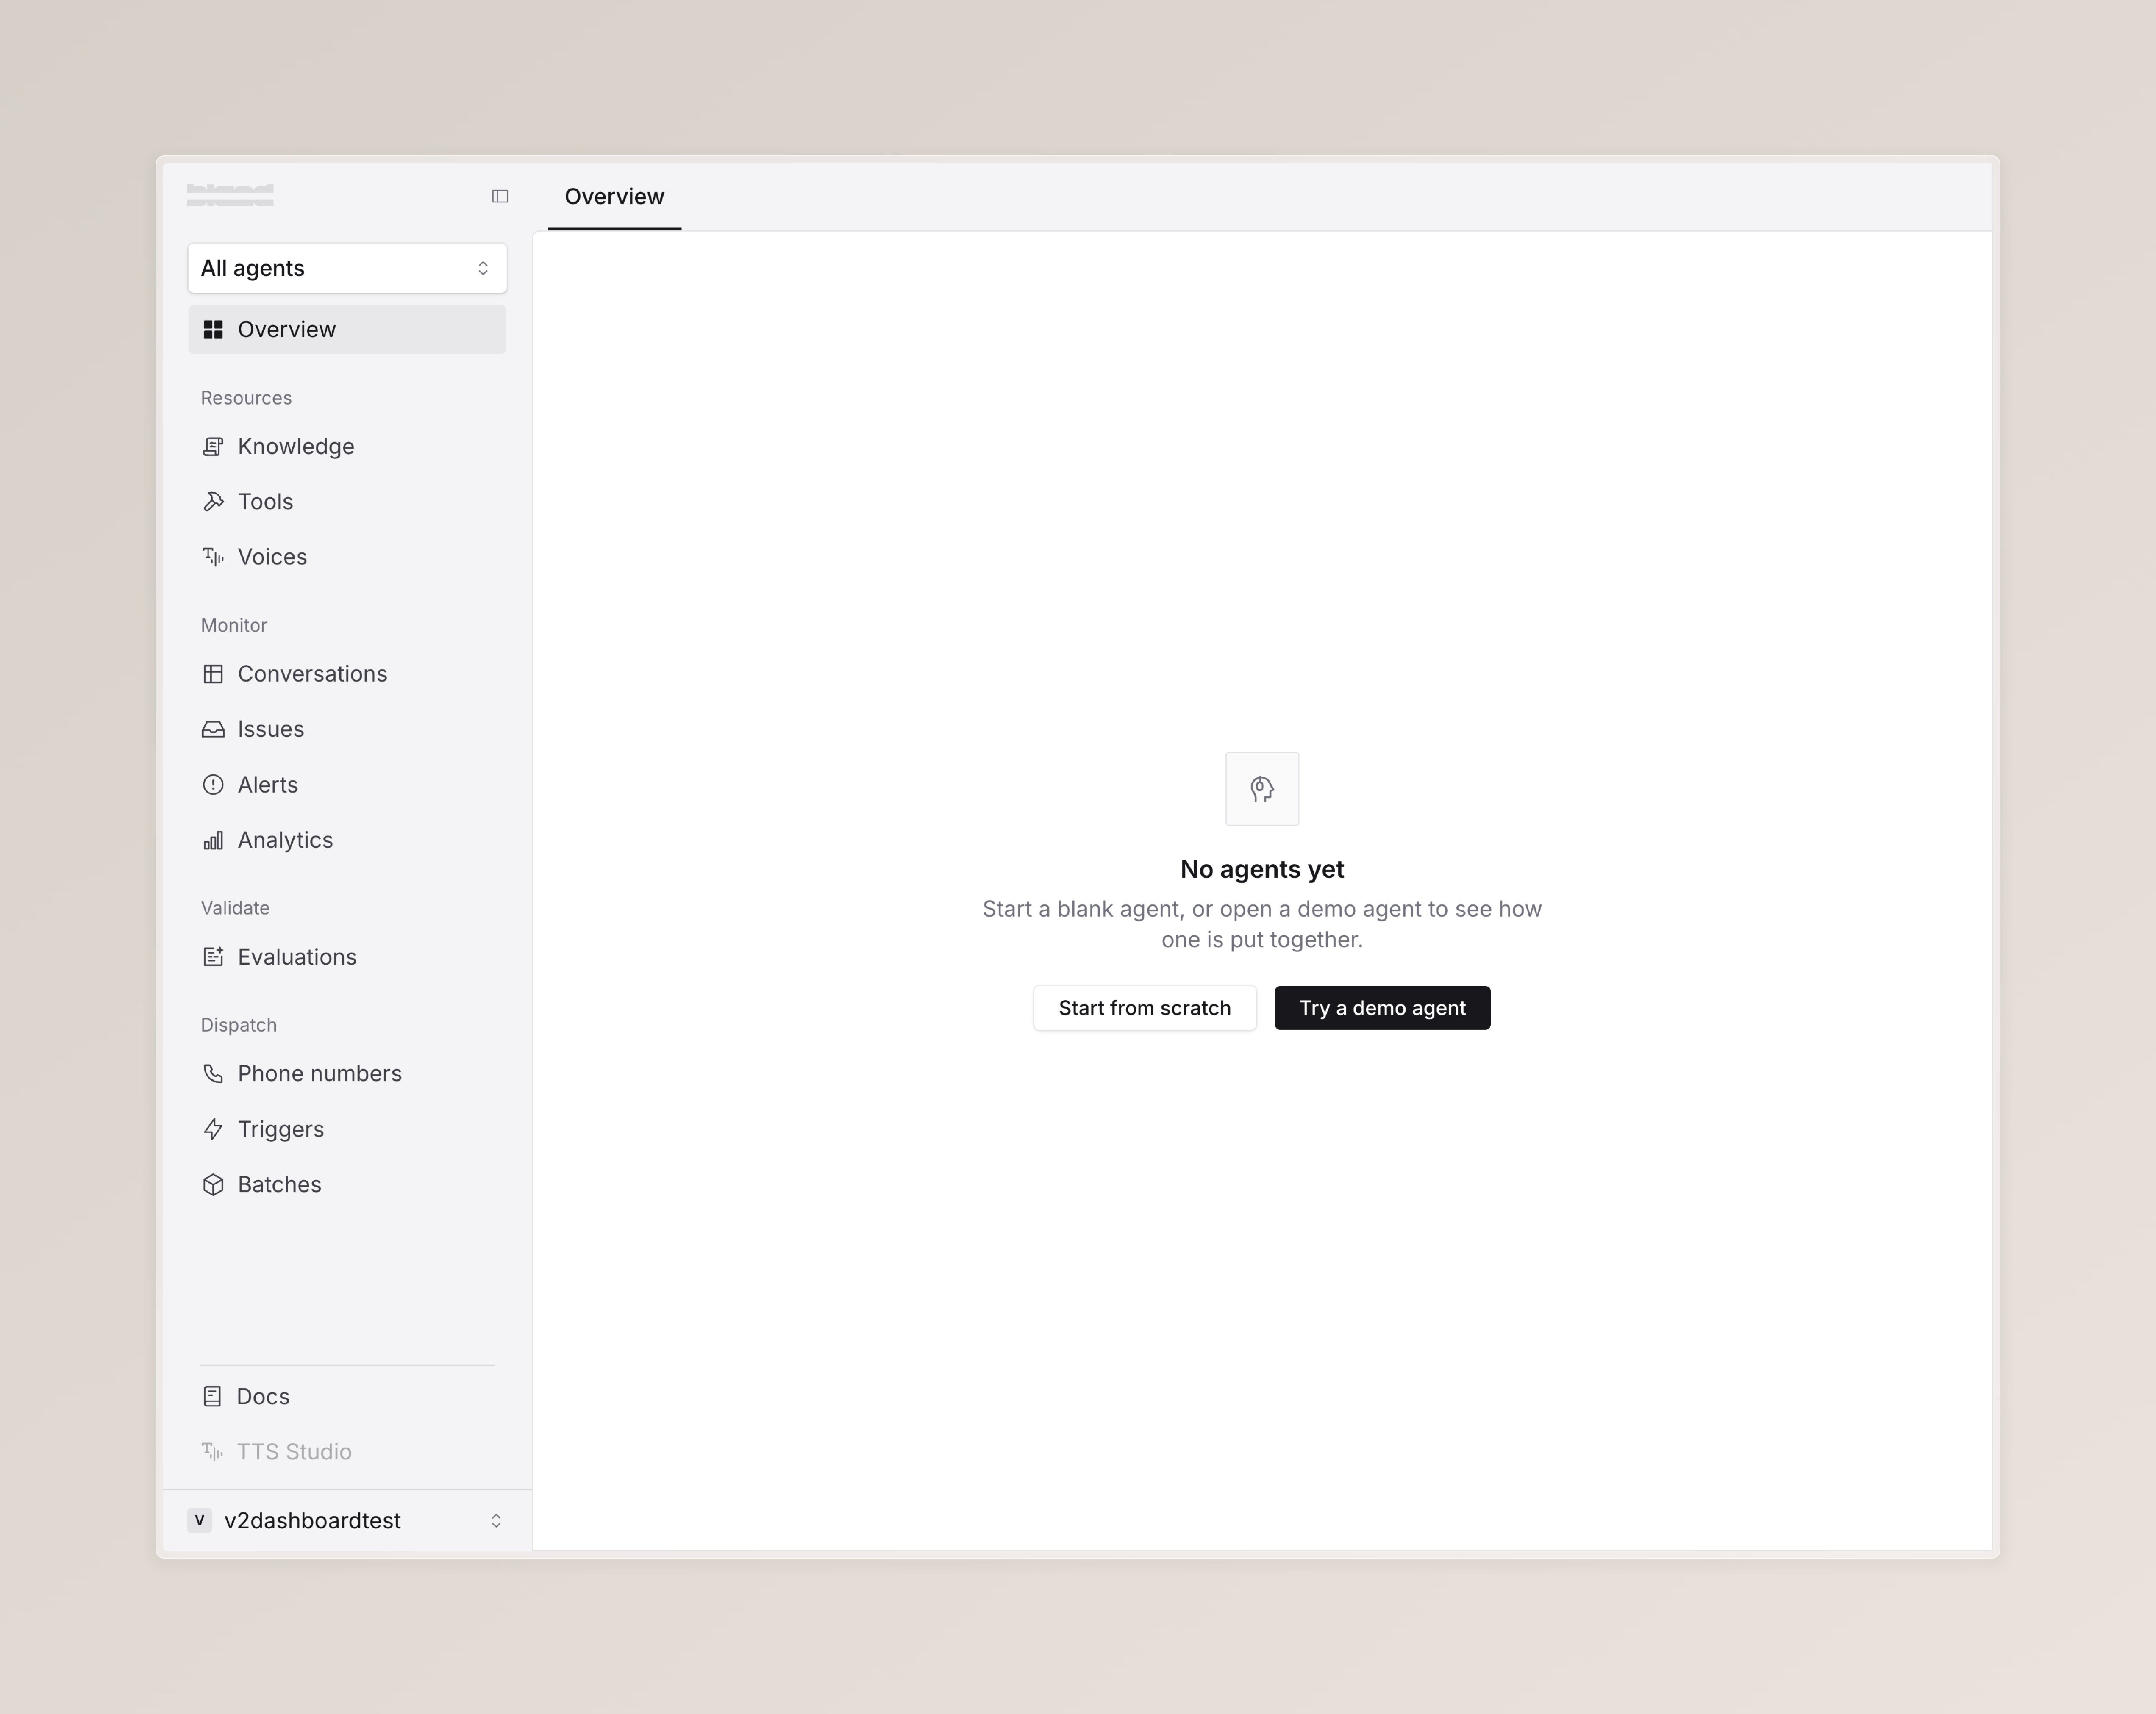
Sign in to the [Bland dashboard](https://v2.app.bland.ai/dashboard). A new account has no agents yet, so the dashboard opens on a "No agents yet" screen with two options.
Pick **Try a demo agent**. Bland adds Marco, a working restaurant-reservation agent, to your account and drops you into the agent builder with a guided tour of the editor. Marco already holds a conversation on its own, so you have a real agent to shape or call as-is.
Prefer to start empty? **Start from scratch** creates a blank agent instead. The rest of this guide applies to either.
 ## Step 2: Buy and attach a phone number
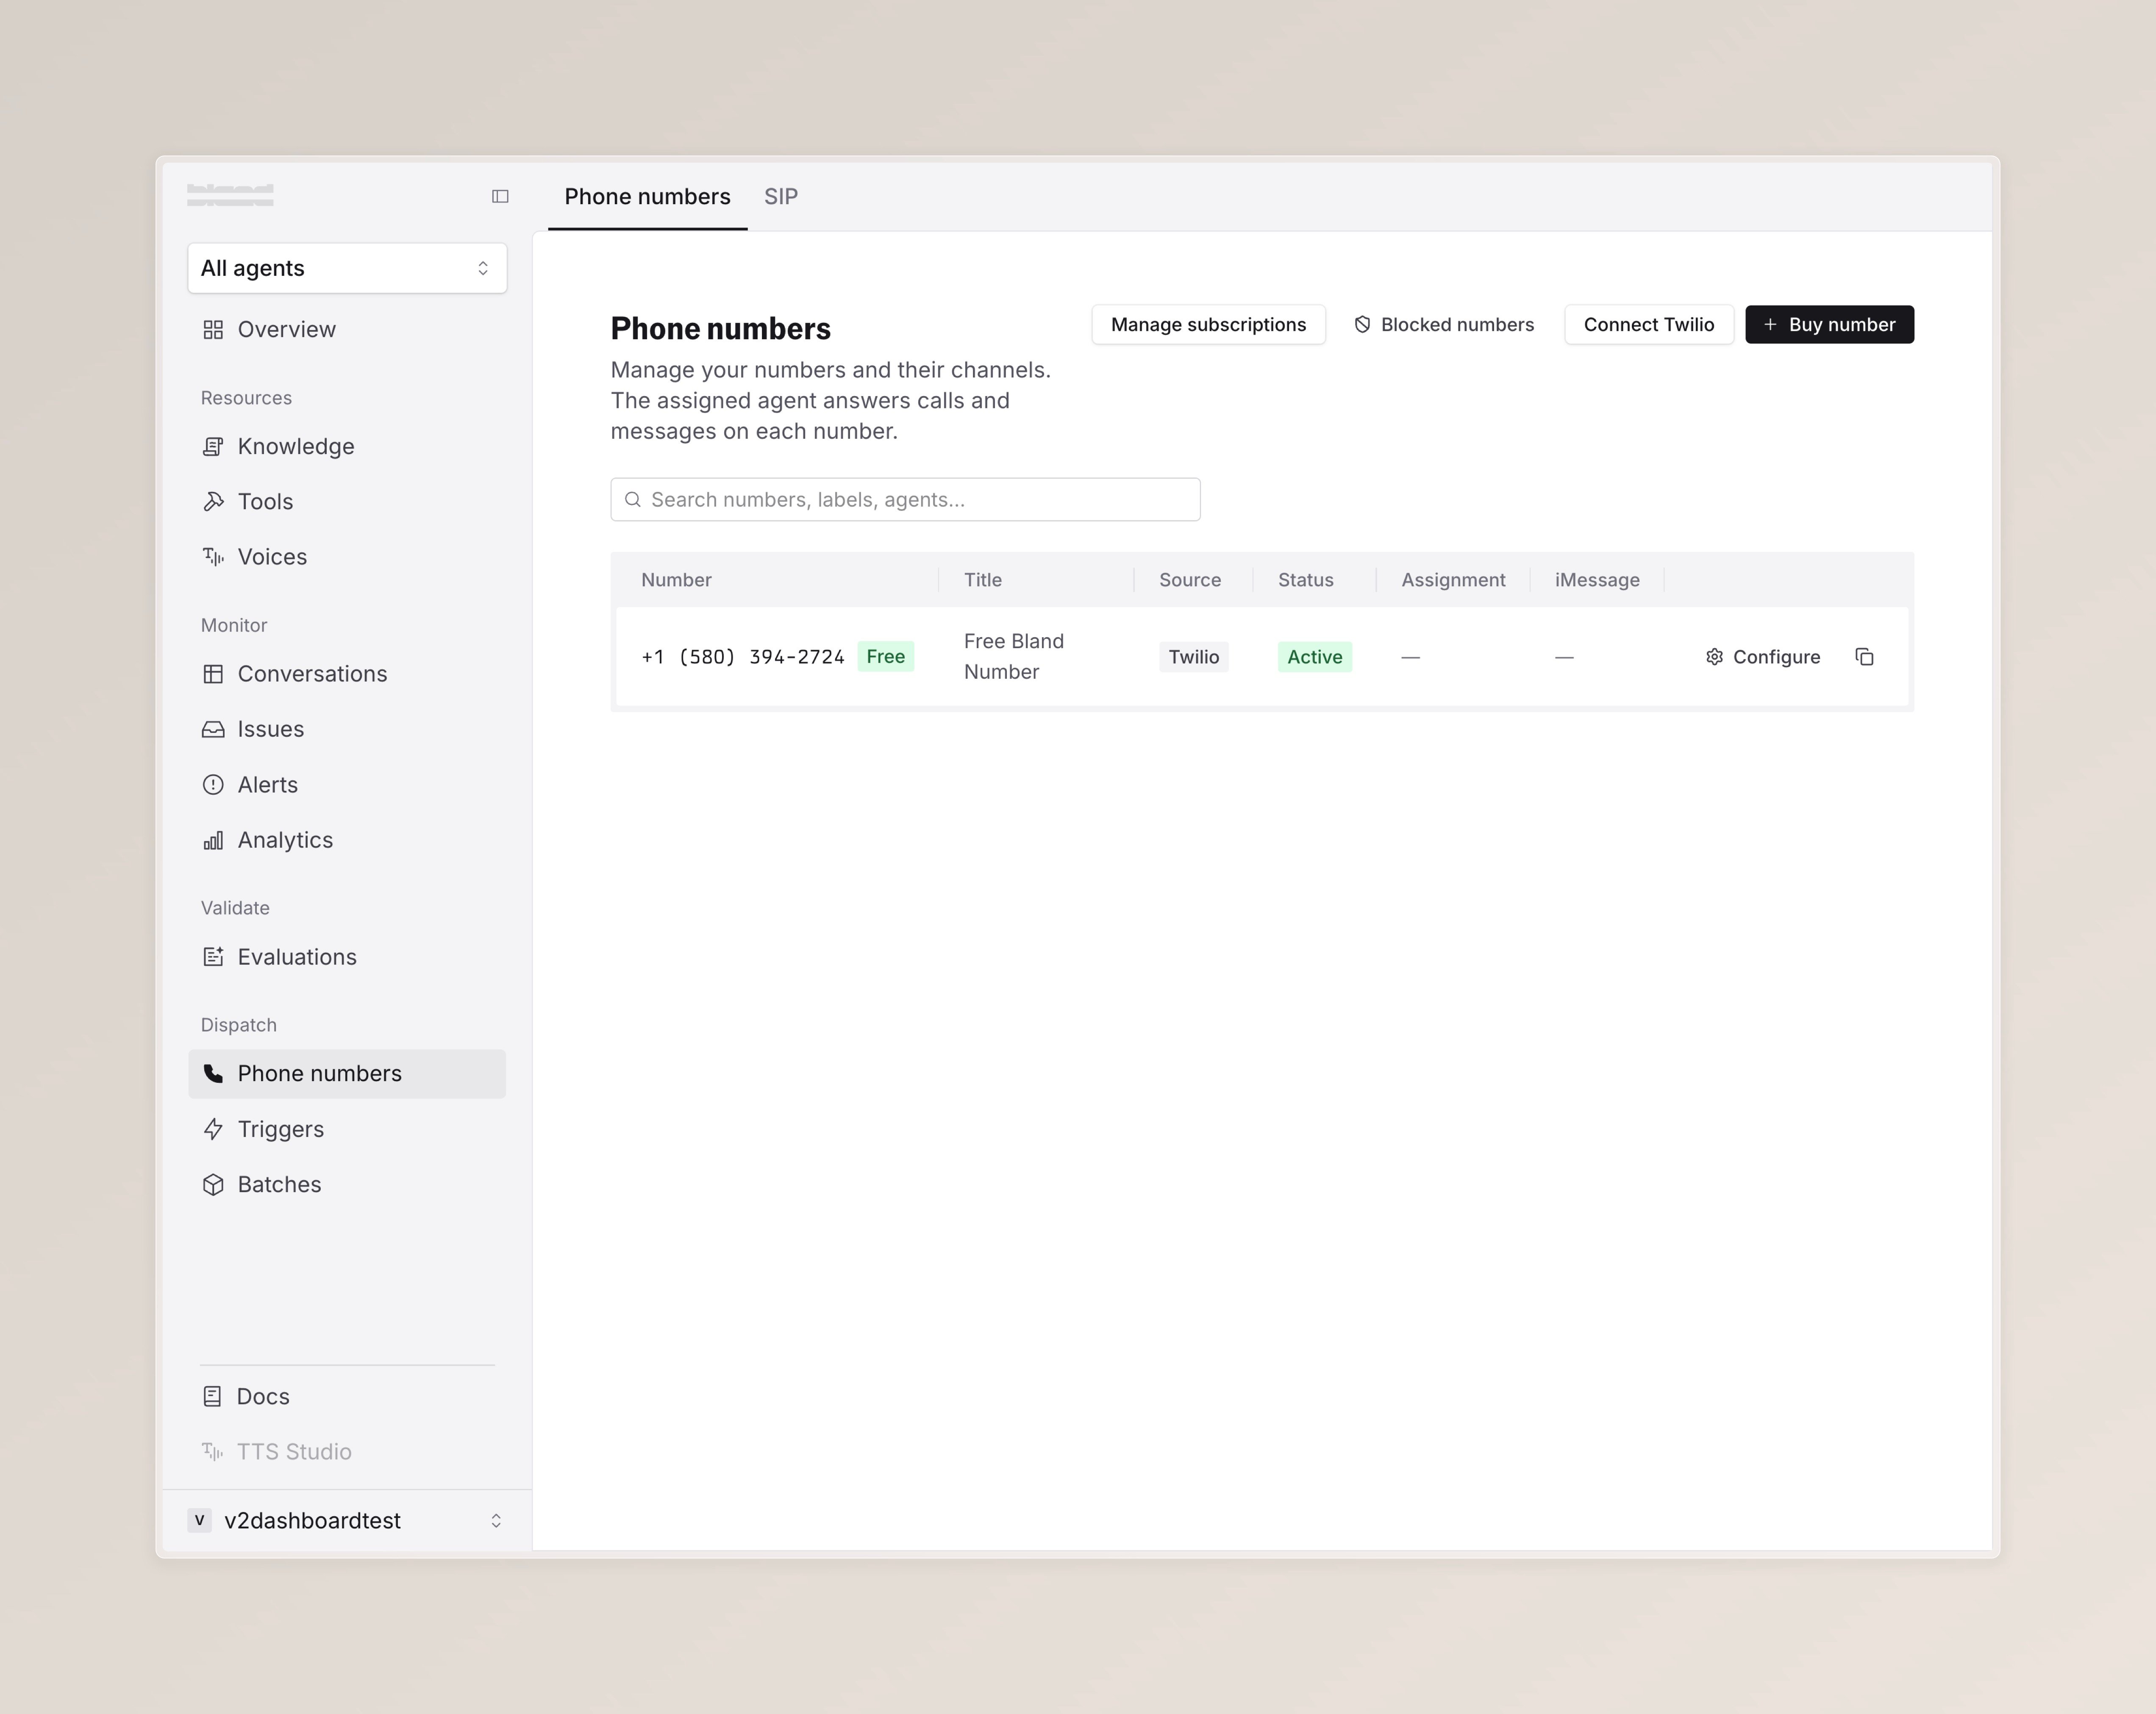
Open [Phone numbers](https://v2.app.bland.ai/dashboard/phone-numbers) from the left sidebar, under **Dispatch**.
Your first US or Canadian number is free, with no payment method required. The page shows a "You have a free phone number available" banner at the top: pick a country, optionally an area code, and activate. The number is added to your account right away.
Attach the number by clicking **Configure** on its row, then picking your agent from the **Assignment** dropdown at the top of the detail sheet. The number now routes calls to that agent.
## Step 2: Buy and attach a phone number
Open [Phone numbers](https://v2.app.bland.ai/dashboard/phone-numbers) from the left sidebar, under **Dispatch**.
Your first US or Canadian number is free, with no payment method required. The page shows a "You have a free phone number available" banner at the top: pick a country, optionally an area code, and activate. The number is added to your account right away.
Attach the number by clicking **Configure** on its row, then picking your agent from the **Assignment** dropdown at the top of the detail sheet. The number now routes calls to that agent.
 ## Step 3: Call the number
From your own phone, dial the number you just set up. The agent answers and holds a conversation.
If the call doesn't go through, the fix is usually one of these, in order of likelihood:
* **No agent is attached to the number.** Go back to the Phone numbers page, click **Configure** on the number's row, and confirm your agent is selected in the **Assignment** dropdown.
* **The number was activated a moment ago and isn't routing yet.** Wait a minute and redial.
* **The call connects but the agent doesn't speak.** Check your conversation logs. If the call appears there, routing worked and the issue is in the agent's configuration, not the number.
That's the golden path. The next two steps are optional additions you can make now or later.
## Step 4: Optionally add tools
Tools let your agent take actions during a call, like looking up a customer record, checking a calendar, or transferring the call to someone else.
From the left sidebar, under **Build**, open **Tools**. A new agent has no tools yet, so the page prompts you to create one. Add whichever tools your agent should be able to call.
## Step 5: Optionally add knowledge
Knowledge lets your agent answer questions from a document, FAQ, or link without you spelling every answer out in the instructions.
From the left sidebar, under **Build**, open **Knowledge**. Add or attach the sources you want the agent to retrieve from on every call.
## Next steps
Transcript and recording of the call from Step 3.
Browse and preview voices in the voice library, then swap the one your agent uses.
Reach the Bland support team.
Join the Bland Discord for live support and daily office hours.
## Step 3: Call the number
From your own phone, dial the number you just set up. The agent answers and holds a conversation.
If the call doesn't go through, the fix is usually one of these, in order of likelihood:
* **No agent is attached to the number.** Go back to the Phone numbers page, click **Configure** on the number's row, and confirm your agent is selected in the **Assignment** dropdown.
* **The number was activated a moment ago and isn't routing yet.** Wait a minute and redial.
* **The call connects but the agent doesn't speak.** Check your conversation logs. If the call appears there, routing worked and the issue is in the agent's configuration, not the number.
That's the golden path. The next two steps are optional additions you can make now or later.
## Step 4: Optionally add tools
Tools let your agent take actions during a call, like looking up a customer record, checking a calendar, or transferring the call to someone else.
From the left sidebar, under **Build**, open **Tools**. A new agent has no tools yet, so the page prompts you to create one. Add whichever tools your agent should be able to call.
## Step 5: Optionally add knowledge
Knowledge lets your agent answer questions from a document, FAQ, or link without you spelling every answer out in the instructions.
From the left sidebar, under **Build**, open **Knowledge**. Add or attach the sources you want the agent to retrieve from on every call.
## Next steps
Transcript and recording of the call from Step 3.
Browse and preview voices in the voice library, then swap the one your agent uses.
Reach the Bland support team.
Join the Bland Discord for live support and daily office hours.